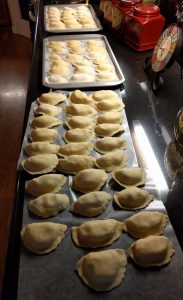
 Growing up, I can still remember when “the call” would come. Grandma had decided to make pierogi and my grandpap would call the house to tell us it was ready. It would usually be early evening when the call would come, and even if we had already eaten dinner, my dad would rush me out the door. We would speed over to grandma’s house, cutting the normally 5-minute drive in half. Somehow, my dad’s older brother, my Uncle Barry, would already be there working his way through the first batch. He lived 10 minutes away from my grandma’s, so how he got there faster than us is a mystery that remains unsolved to this day. My gut tells me he had inside information about when pierogi were being made, but neither he nor my grandparents ever fessed up to it.
My grandma’s pierogi recipe was a hand-me-down from my great grandma (my grandpap’s mother). She was an immigrant from the old country, Ukraine to be exact. My grandmother took over the recipe and mastered it, with a couple of minor tweaks. My mom and dad took over the recipe from my grandma, continuing the family tradition. Store bought pierogi are good, but they don’t come close to matching the real thing.
Someday, I knew that I should take over the recipe to continue the family tradition. I had procrastinated for years, but watching the Michael Pollan documentary “Cooked” inspired me to action. My parents visited this past summer, and I decided it was time to learn the recipe. I set aside an afternoon to spend in the kitchen with them. It was time well spent.
(By the way, if you don’t know what a pierogi is, check out this Wikipedia article. It includes information about the origin and history, too.)
The Pierogi Recipe
The recipe for pierogi isn’t complicated. There are two parts – the dough and the filling. The dough is the most important as the filling can be just about anything you like. For my first go round, I decided to use a filling of potato and cheese, which is what my grandmother typically put in her pierogi when she made them. Let’s start with the instructions for the dough.
Dough ingredients and instructions
8 Cups flour (all purpose, unbleached flour works well)
1/2 tsp salt
4 eggs
1 Cup warm water
1/2 pint sour cream (this is the key to getting good texture and taste)
In a large bowl, mix the eggs, sour cream and salt. Stir in flour and warm water. After flour and water are mixed in, knead the dough with your hands until it has a smooth velvety texture. Roll into a large ball and let rest for 20-30 minutes in the mixing bowl. Cover the bowl with a tea towel to keep the dough from drying out while it rests.
Potato and cheese filling ingredients and instructions
5 pounds potatoes (suggest using Idaho Russet potatoes)
3 pounds sharp cheddar cheese (extra sharp can also be used, depending on desired taste)
Peel potatoes and quarter. Place in a large pot of water and bring to a boil and cook as if preparing mashed potatoes. Remove from heat and drain when potatoes have softened. Drain and quickly transfer to a large bowl. While still hot, add cheese and start mashing until potatoes and cheese are combined evenly into a smooth mixture. Cover and set aside.
The Making of the Pierogi
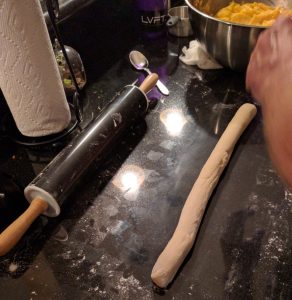 To make the pierogi, start by taking a section of the dough (about 1/8 of it) and roll with your hands into a rope that is about 1-inch in diameter (see picture right).
Next, take the rope, and cut it into sections that are approximately 1-inch in length. You can use a butter knife or a pair of kitchen scissors.
Once you have sectioned the dough, each piece is rolled out into a circle. The circles should be around 3 1/2 inches in diameter with a uniform thickness. The thickness will be determined by how round you decide to make the circles, but I’d recommend not making it too thin.
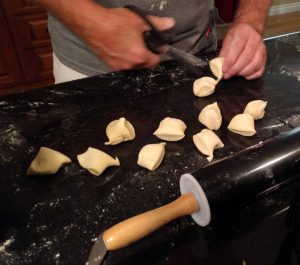 Using a tablespoon (for eating, not measuring), spoon a generous amount of filling onto the dough circle. Fold the dough around the filling and crimp securely with your fingers. The dough should be somewhat sticky, enough that it sticks together after crimping with your fingers. If necessary, you can sprinkle a small amount of water to hold it together. The sealing of the filling inside the dough is very important as your don’t want the filling to “boil out” during cooking.
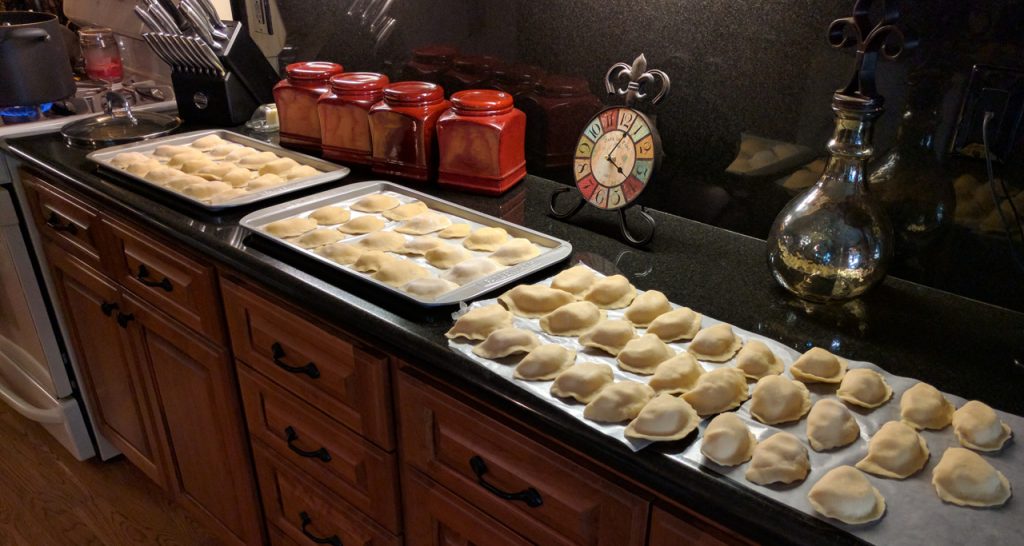
Once the pierogi is assembled, place on a floured baking sheet. Continue assembling pierogi until all of the dough has been used. It’s likely you’ll end up with extra filling which can be discarded or used later as a side dish for another meal.
To cook, bring a large pot of water to a boil. Add a dozen or so pierogi to the boiling water. The pierogi should sink to the bottom. Stir occasionally while cooking. Once the pierogi float to the top, allow to cook for another minute and then remove from the water with a straining spoon and transfer to a large bowl. Add one tablespoon of butter to the bowl for every batch that is finished and stir to keep pierogi from sticking together.
The Finished Product
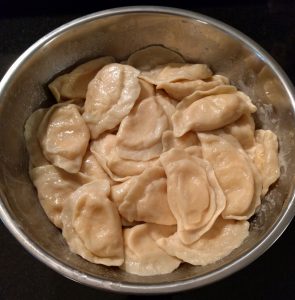 Once the butter has melted in the bowl, the pierogi are ready to eat. It’s best to start eating while they are warm and the other batches are cooking. Sour cream is the best condiment to serve with the finished pierogi and adds to the experience.
We made more than enough for the 6 of us that we’re at dinner that night. We put the leftover in the refrigerator, and then my dad made a special treat the next day. He fried the pierogi. It made the outside shell crispy. The texture was quite different than the pierogi right from the water. My dad swears by the fried pierogi, and he may be right. Quite honestly, I enjoy them both ways!
Ideas for Next Time
There’s always room for improvement when you do something the first time. Here are a couple of things I would do differently the next time around:
- Try some additional items in the filling. It would more interesting with some lightly sauteed spinach and green onions in addition to the potatoes and cheese.
- Use the pasta maker we have to roll-out the dough. This would create a nice uniform thickness for the sheets. Then use a glass, or some other object with a diameter of 3 1/2 inches to cut out circles in the dough.
Otherwise, things went really well for the first time. I’m looking forward to making them again!

Pingback: Tales from the Test Kitchen: Baking vs Cooking - Gregg Borodaty
Pingback: Baking: The Long and Winding Road - Gregg Borodaty