
Having a good local environment is important for doing development work, especially web development. It both saves time and makes deployment to production environments easier.
I’ve used WampServer in the past for local development. It’s served me well, but it seems to have stagnated since I upgraded to version 3.0. I had looked into switching to Windows Subsystem for Linux (WSL) over a year ago, but it felt like it needed to mature, which it has. So, in this post, I am going to outline the steps I took to transition my local development environment from WampServer to WSL.
What We’ll Be Doing
The purpose of this post is to migrate the website and web projects using WampServer on my local development machine to an operational LAMP stack using WSL on Windows. We will do the following:
- Enable the WSL feature on Windows
- Install and configure Linux
- Install the components to create a LAMP web server
- Migrate projects from WampServer to the WSL LAMP server
Be aware that this is not a detailed, step-by-step guide. There are many existing instructional guides that detail setting up WSL and a LAMP environment on WSL. Instead of re-inventing the wheel, I plan to reference the posts I found most helpful. I will also point out any subtle points or deviations I had to take to get things working properly.
Background
Before getting into the migration process, here’s a quick background on the reasons why I decided to switch from WampServer to WSL:
- WSL is the first step Microsoft is taking toward native support for Linux. WSL2, which is working it’s way towards a stable release, should provide even better Linux integration with kernel updates delivered through the regular Windows Update mechanism. I would have started with WSL2, but it feels like it’s not quite ready for prime time yet.
- I wanted a Linux environment that was a closer match to the Linux server where I deploy my public facing web projects.
- Since I have a few projects in WordPress (like this one), I wanted a stable environment for WordPress development and testing.
- There are other server based applications like Node.js that I wanted to experiment with, as well as other programming languages like Python. While these work on Windows without requiring WampServer, I wanted to use the Linux counterparts to make it easier to deploy to my public facing web server.
So with that out of the way, let’s get down to business.
Preparation
Unlike some developers (or maybe most), I like to see how deep the water is before I dive into a project. I do my research so I know what I need to have available and to be prepared for any potential gotchas. Here are the resources I used:
- Microsoft: Windows Subsystem for Linux Installation Guide for Windows 10 – from the source, what better place to start
- Ubuntu: Ubuntu on WSL – link to the latest distro on the Microsoft Store
- codza: LAMP stack in Windows 10 WSL – detailed walkthrough with tips and hints on setup
- Shay Anderson: Install LAMP on Windows 10 with WSL – additional configuration options for future reference
- DigitalOcean: How To Install Linux, Apache, MySQL, PHP (LAMP) stack on Ubuntu 20.04 – generic guide (DigitalOcean docs are very well done)
- DigitalOcean: How To Install MariaDB on Ubuntu 18.04 – for MariaDB specific details
I sifted through quite a few other articles that I found during my Google searches as well. Overall, I spent about an hour doing the prep work.
Note: You may choose to install MySQL as your database, and the above links will include instructions. I’ve chosen MariaDB because it mirrors my production environment.
Prerequisites
This remainder of this article assumes the following:
- A basic understanding of Linux bash shell commands
- Comfort using a Linux text editor such as vim or nano
- Windows Version 1903 or later (see here for checking build version number)
- Basic knowledge creating and configuring virtual hosts in a LAMP environment
- Experience importing and exporting MySQL databases
Step 1: Enable WSL feature on Windows
To get started, the WSL feature needs to be turned in Windows. It can be done through the PowerShell or through Windows Settings. Since I’m more of a graphical person when it comes to Windows, I took the menu approach rather than using PowerShell.
- Under the Windows ‘Start Menu’, open the Windows Settings using the gear icon
- Select ‘Apps’
- Under ‘Related Setting’ (upper right corner), select ‘Programs and Features’
- In the pop-up window, select ‘Turn Windows features on or off (left column, last entry)
- In the Windows Features box, scroll until you see Windows Subsystem for Linux, which will be near the bottom
- Select it, click OK, and then restart
(Here is a link to a good guide with pictures that also covers Step 2: Install a Linux distro)
Step 2: Install a Linux distro
There are many Linux distros to choose from in the Windows Store. I followed the instructions in the link provided at the end of Step 1 above, the ‘good guide with pictures.’ The instructions under the heading ‘Installing Linux distros using Microsoft Store’ are straight-forward and easy to follow. As part of this process, you will be required to select a username and password for your Linux account. Make sure that you write down this information and keep it in a safe place. You’ll need to reference it later and in the future.
** NOTE: If you choose Ubuntu as your Linux distro as I did, select Ubuntu LTS version 18.04, NOT 20.04. An issue exists in the interaction between the libraries used in Ubuntu 20.04 LTS and WSL (see here if interested in a more detailed description). The Windows WSL team is planning to fix the issue, but a release date has not been set. This was the current state of affairs when I performed the installation in April 2020.
I also recommend referencing and following Microsoft’s instructions to initialize a newly installed distro. While overlap exists with the graphical guide I referenced, Microsoft covers updating and upgrading the distro’s packages, which needs to be done before installing the remaining LAMP components.
** NOTE: One item Microsoft doesn’t mention in their instructions is keeping your Linux distro up-to-date. Make sure you run the update and upgrade command every 3-4 weeks or so, if not more often. Otherwise, the upgrade process becomes painful if the packages fall too far out of date. On an Ubuntu system, the command is:
$ sudo apt update && sudo apt upgradeAfter completing Step 2, you will be able to launch an operational Linux shell within Windows. If all goes smoothly, it should take ~15-20 minutes to get to this point.
Step 3: Install Apache, MySQL and PHP
To install the remaining LAMP components, I suggest following one of these guides:
- For the basics to get up and running: LAMP stack in Windows 10 WSL
- For more advanced setup options, like setting up SSH access into the Linux server: Install LAMP on Windows 10 with WSL
I used the first link to get up and running quickly, with a couple of notes and adjustments:
- When you first start Apache, the Windows firewall is likely to complain. Go ahead and give Apache access.
- When starting Apache, I ran into the issue outlined in the instructions:
Protocol not available: AH00076: Failed to enable APR_TCP_DEFER_ACCEPT. This is a warning level message, so it’s not clear, even from the WSL team, if it needs to be addressed. I went ahead and added the ‘AcceptFilter’ statements to the Apache configuration to suppress the warnings. - My production server uses MariaDB instead of MySQL. I used these instructions from the DigitalOcean website to install MariaDB instead of MySQL. If you go this route, do NOT install MySQL and MariaDB. Instead swap out the MySQL installation instructions with the MariaDB instructions.
- As mentioned above, I prefer using a GUI environment when it is available. Therefore, I followed the instructions on codza to install phpMyAdmin. This is an optional step, but it makes it easier for me to manage the SQL database(s). Just keep in mind that the latest versions of MySQL and MariaDB do not allow the ‘root’ user to login via phpMyAdmin. You will need to create a second user as described here. And finally, there may be some warnings on the import/export that can be fixed by reading through the thread here.
By the way, if you do go the MariaDB route and install Ubuntu 18.04 LTS, be aware that it comes with MariaDB 10.1. The latest version of MariaDB is 10.4. If you would prefer to use the latest version of MariaDB, run the following commands:
$ sudo apt-key adv --fetch-keys 'https://mariadb.org/mariadb_release_signing_key.asc'
$ sudo add-apt-repository 'deb [arch=amd64,arm64,ppc64el] http://mirror.netinch.com/pub/mariadb/repo/10.4/ubuntu bionic main'
$ sudo apt update
$ sudo apt install mariadb-server
Then type the following to verify that you have the latest version of MariaDB installed:
$ mysql -VAlso, when running the secure installation script for MariaDB version 10.4, be sure to answer ‘Y’ when asked if you want to ‘Switch to unix_socket authentication’. Since I created a root password for the database, answering no to this questions caused all sorts of problems. It’s OK to answer Yes to all other secure installation questions.
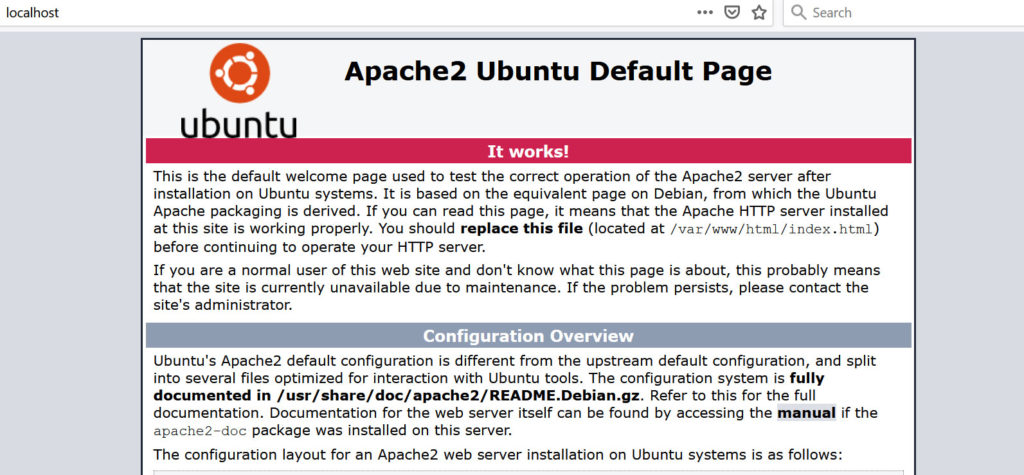
Step 4: Test the Apache server
Before continuing, check to make sure that Apache is running. To do so, first make sure both Apache and MariaDB are running by checking the service list:
$ sudo service --status-allBoth the apache2 and mysql should have a ‘+’ sign by them. If not, enable the service that requires it as follows:
$ sudo service mysql start
$ sudo service apache2 start
Open the browser and go to http://localhost. You should see the following:
Step 5: Create a phpinfo() site
Now would be a good time to setup a local site to display the status of PHP modules installed using the phpinfo() function. I would never do this on a production server, but it’s not a bad idea on a local development server so you can see which PHP modules and versions are installed.
In a directory where you are going to store all you web projects, such as C:\www, create a directory, and then create a file named index.php with the following:
<?php phpinfo() ?>Then, in the apache config area at /etc/apache2/site-enabled, add a virtual host entry that points to the directory where the index.php is created. Using the example above, it would be /mnt/c/www/<directory_name>. Put a ServerName in the VirtualHost, and also be sure to add that ServerName to the Windows host file at C:\Windows\System32\drivers\etc. If you’ve been using WampServer for a while, there should be other local server names in this file.
Once all these items have been setup, restart apache, and the following should show up when you access the local domain created above.
 function")
After completing step 5, the LAMP web server is operational. It’s time to migrate the sites from the existing WampServer area to the WSL Linux install.
Theoretically, it should only take 1-2 hours to get to this point, provided you don’t run into any issues. If you do, it’s possible it could take up to twice as long.
Step 6: Migrate web content to WSL
To migrate content, locate the WampServer virtual hosts file. It should be at the following location:
<path_to_wampserver_install>\bin\apache\apache2.4.23\conf\extra\httpd-vhosts.confThis file can be moved over to the WSL virtual hosts file area by doing a copy, or each virtual host can be moved over one at a time. In the case of Ubuntu, the virtual hosts file(s) need to be moved to:
/etc/apache2/sites_availableAfter copying the file over, edit it so the root of each directory points to ‘/mnt/c/’ instead of ‘C:\’, or whatever the drive letter happens to be. Also be sure to change all the Windows backslashes in the pathname to Linux forward slashes. At this point, the following commands can be run to have access to the sites in a browser:
$ sudo a2ensite httpd-vhosts.conf
$ sudo apache2ctl configtest
$ sudo service apache2 reload
The middle command checks syntax of the Apache configuration. It will report any errors in the configuration that need corrected before reloading the configuration.
If the sites are loading as expected, you can move onto to migrating the databases from the WampServer environment. However, if you’re up for it, there are a few optimizations you can make to clean things up a bit:
- Move all of the site content to a new location on disk so it is outside the WampServer install directories. This allows uninstalling WampServer and removing the related directories without losing your content.
- Move each site to its own virtual host file to have better control over each of the site configurations, and to facilitate enabling and disabling of sites on an individual basis.
I moved the virtual host file as is first to see if the migration worked. Then I moved forward with the optimizations above to make future maintenance easier.
Step 7: Migrate MySQL database files
For the final step, stop the apache and mysql services on the WSL instance. Start WampServer, go into phpMyAdmin, and export each of the active databases being used in gzip format.
Once done, exit WampServer. Restart the mysql and apache services on the WSL Lamp server. Using phpmyadmin or the mysql command line, import each of the databases. If the databases are linked to the content sites, such as a WordPress website, make sure to migrate or update the database user names, passwords, and access privileges
Step 8: Check each active site
At this point, each site needs to be checked. It’s possible some configurations items and setting may not have made it through the migration process. You’ll need to use your debug and Google search skills to correct any issues that come up.
It’s a tedious process. Depending on the number of sites you have, it could take 3-4 hours (or longer) to migrate everything. All in all, it’s worth the effort.
Once you’ve completed the process, you’ll have a near native Linux experience that is supported by the underlying Windows OS. I’m looking forward to an even more robust experience when WSL2 is available later this year.
Disclaimer: These instructions applied to my specific development environment. What I’m hinting at, in not so many words, is that these instructions may require adjustment based on the specifics of your setup. I am more than happy to entertain questions in the comments and will do my best to assist with any issues you may run into during the migration process, but I cannot guarantee timely and/or accurate responses.
Also, keep in mind that the instructions were created April 2020 and that certain steps may or may not be necessary as various pieces of the technology stack are updated by their respective owners.
Pingback: Setting up WordPress for local development - Gregg Borodaty